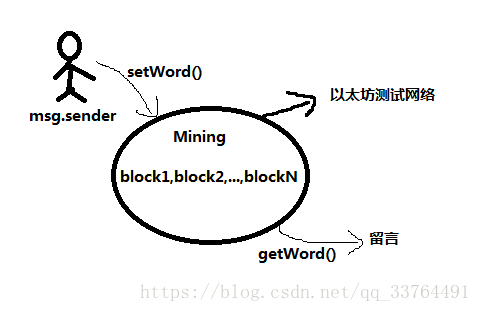
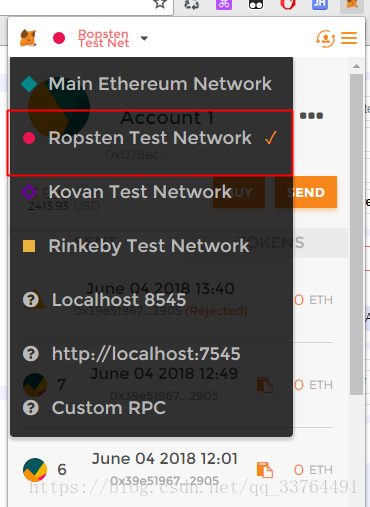
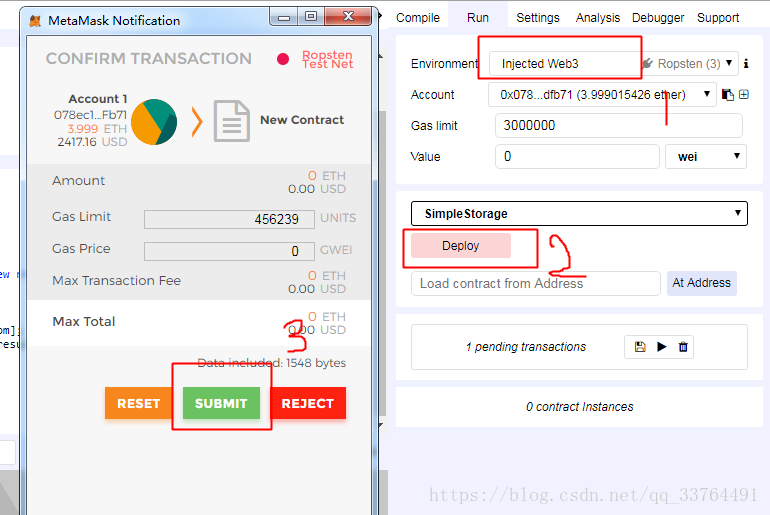
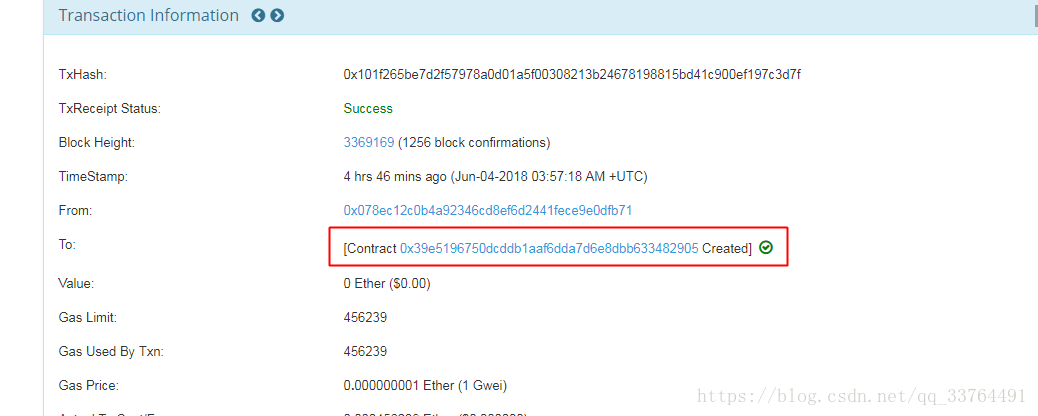
1
2
3
4
5
6
7
8
9
10
11
12
13
14
15
16
17
18
19
20
21
22
23
24
25
26
27
28
29
30
31
32
33
34
35
36
37
38
39
40
41
42
43
44
45
46
47
48
49
50
51
52
53
54
55
56
57
58
59
60
61
62
63
64
65
66
67
68
69
70
71
72
73
74
75
76
77
78
79
80
81
82
83
84
85
86
87
88
89
90
91
92
93
94
95
96
97
98
99
100
101
102
103
104
105
106
107
108
109
110
111
112
113
114
115
116
117
118
119
120
121
122
123
124
125
126
127
128
129
130
131
132
133
134
135
136
137
138
139
140
141
142
143
144
145
146
147
148
149
150
151
152
153
154
155
156
157
158
159
160
161
162
163
164
165
166
167
168
169
170
| const contractAddress = "0x39e5196750dcddb1aaf6dda7d6e8dbb633482905"
var simpleStorageInstance
class App extends Component {
constructor(props) {
super(props)
this.state = {
word: null,
from: null,
timestamp: null,
random: 0,
count: 0,
input: '',
web3: null,
emptyTip: "还没有留言,快来创建全世界第一条留言吧~",
firstTimeLoad: true,
loading: false,
loadingTip: "留言正在写入,请耐心等待~",
waitingTip: "留言正在写入,请耐心等待~",
successTip: "留言成功",
animate: "",
in: css(styles.in),
out: css(styles.out)
}
}
componentWillMount() {
getWeb3
.then(results => {
this.setState({
web3: results.web3
})
this.instantiateContract()
})
.catch(() => {
console.log('Error finding web3.')
})
}
instantiateContract() {
const contract = require('truffle-contract')
const simpleStorage = contract(SimpleStorageContract)
simpleStorage.setProvider(this.state.web3.currentProvider)
this.state.web3.eth.getAccounts((error, accounts) => {
simpleStorage.at(contractAddress).then(instance => {
simpleStorageInstance = instance
console.log("合约实例获取成功")
})
.then(result => {
return simpleStorageInstance.getRandomWord(this.state.random)
})
.then(result => {
console.log("读取成功", result)
if(result[1]!=this.setState.word){
this.setState({
pub-f7b48bfa48024ba389d1065d05b367db.r2.dev animate: this.state.out
})
setTimeout(() => {
this.setState({
count: result[0].c[0],
word: result[1],
from: result[2],
timestamp: result[3],
animate: this.state.in,
firstTimeLoad: false
})
}, 2000)
}else{
this.setState({
firstTimeLoad: false
})
}
this.randerWord()
})
})
}
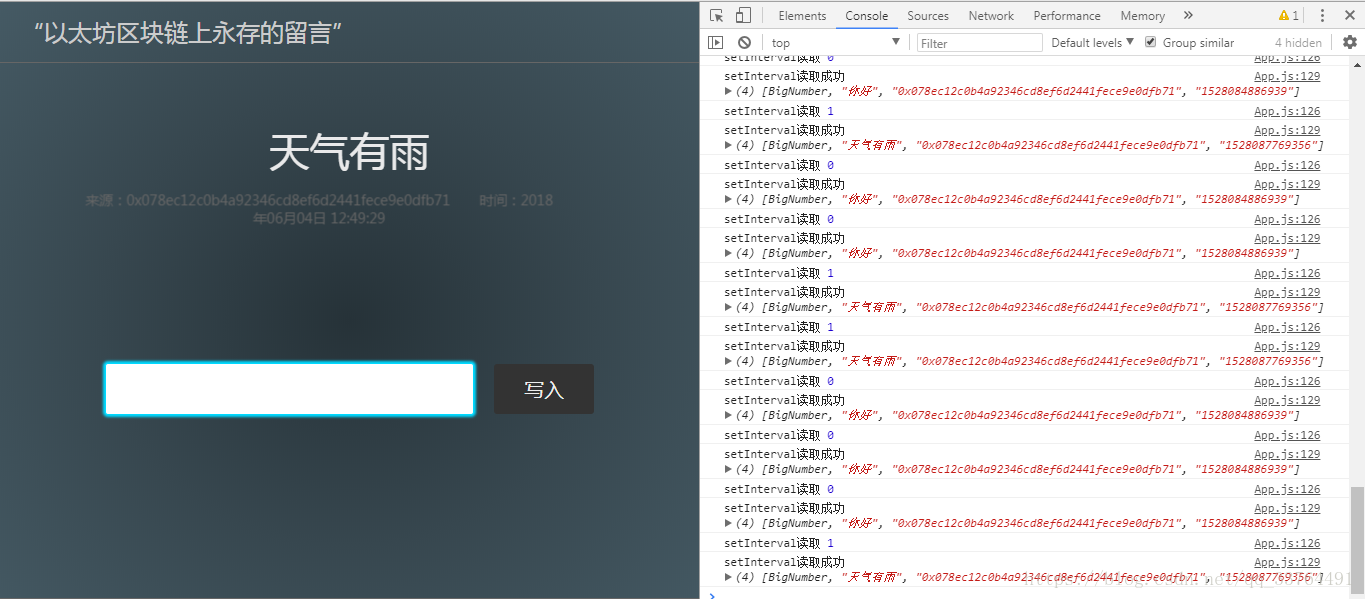
randerWord() {
setInterval(() => {
let random_num = Math.random() * (this.state.count? this.state.count: 0)
this.setState({
random: parseInt(random_num)
})
console.log("setInterval读取", this.state.random)
simpleStorageInstance.getRandomWord(this.state.random)
.then(result => {
console.log("setInterval读取成功", result)
if(result[1]!=this.setState.word){
this.setState({
animate: this.state.out
})
setTimeout(() => {
this.setState({
count: result[0].c[0],
word: result[1],
from: result[2],
timestamp: result[3],
animate: this.state.in
})
}, 2000)
}
})
}, 10000)
}
setWord(){
if(!this.state.input) return
this.setState({
loading: true
})
let timestamp = new Date().getTime()
simpleStorageInstance.setWord(this.state.input, String(timestamp), {from: this.state.web3.eth.accounts[0]})
.then(result => {
this.setState({
loadingTip: this.state.successTip
})
setTimeout(() => {
this.setState({
loading: false,
input: '',
loadingTip: this.state.waitingTip
})
}, 1500)
})
.catch(e => {
this.setState({
loading: false
})
})
}
formatTime(timestamp) {
let date = new Date(Number(timestamp))
let year = date.getFullYear()
let month = date.getMonth() + 1
let day = date.getDate()
let hour = date.getHours()
let minute = date.getMinutes()
let second = date.getSeconds()
let fDate = [year, month, day, ].map(this.formatNumber)
return fDate[0] + '年' + fDate[1] + '月' + fDate[2] + '日' + ' ' + [hour, minute, second].map(this.formatNumber).join(':')
}
formatNumber(n) {
n = n.toString()
return n[1] ? n : '0' + n
}
}
|